Almost There
Well…tomorrow is the day our son will be born!
It goes without saying that I’m extremely excited, and for those who have been following along with this build, it was the deadline that has pushed me to make some serious progress on the old 1701-A over the past couple months.
But…there is still some work to be done, so no final video like I promised just yet. However I’m very happy with where I’m at with the build.
Once I saw that there just wasn’t enough hours in the day to get it all finaled without killing myself, my goal shifted instead to getting the old girl all put together, wired, puddied, and cleaned up. So now all that needs to be done is the final decals, mount it to the base, and then mount that base to a wood plaque I picked up at our hobby store. Which is something my wife can do whenever we have a few minutes and isn’t too laborsom.
*sigh of relief*
So with that all said…how bout some pictures?!
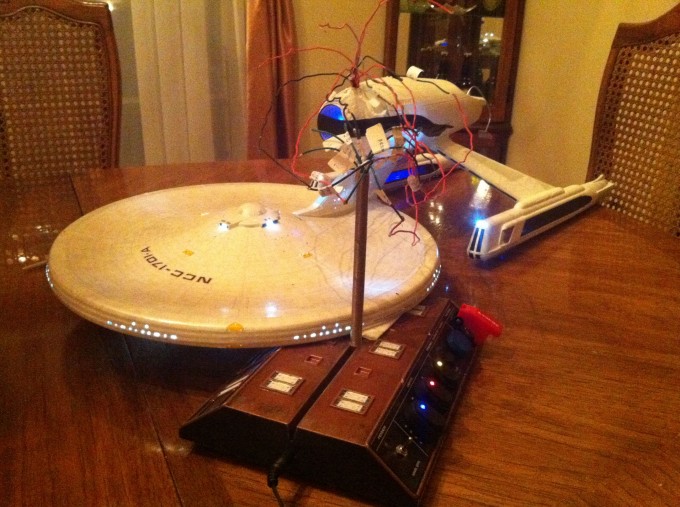
As you can see, the ship is fully assembled now and as of last night I’ve finished up all of the paint detail and clean up work on the Secondary Hull and most of the Saucer section and Nacelles. I mainly focused on the Secondary Hull however to get it all ready for the decals.
I took this wihle I was gluing the deflector dish to the Secondary. One thing I learned is that when assembling this part of the ship, it’s all about the order in which you do it. And I did it wrong, ha. What I should have done is glue the deflector to the secondary, and then attach the saucer. So since I didn’t know that until afterwards I had a hell of a time getting rid of a gap between the top of the deflector and the saucer neck.
It worked out in the end, but ya. It was a pain.
I’m also going to need to balance the nacelle hull flood lights. Right now one side is coming out much brighter than the other, thanks to a bit of hot glue that covered the led and dulled it down. Which I’m not quite sure yet how to fix this, but I have a few ideas. Maybe just some more drilling to get that flood light uncovered with glue will do the trick. But if that doesn’t work, I might just dull down the other bright spot so that it at least looks consistent.
If I do end up doing that, the plan to get the hull all nice and bright when the floods come on will be to install a few LEDs in the space station style base instead. Which might actually look really cool and I’ve never seen anyone do that before. So we’ll see.
The few flaws aside though, I’m incredibly proud and happy of how this legendary ship and model all came together. Even when I was pulling my hair out trying to figure out all the electronics and sanding off pesky finger prints that appeared from being too impatient, this build has been so much fun.
Alright, that’s the update for today.
Time to go be a Dad. See you all on the other side!


Glad to see you finally plucked up the courage to get started on this beast Doug!
I too was a bit concerned about the aluminum tape shorting things out (well, I will be when I evenually get round to tackling my big E), and have been experimenting with a second layer of tape (insulating this time) on top of the aluminum tape in the areas at risk – might be worth a try?
Going to be building the new PL TOS Enterprise? : )
Nice work so far btw.
Bernie
Hey Bernie! Thanks for the comment!
Ya the foil tape is pretty tricky. It reflects light amazingly and insulates your wires really well but if things get packed tightly, you’ll definitely start see some shorts like I was finding in my saucer. A trick I used was just using the wax paper from the backside of foil tape to kind of “sandwich” the problem areas. It’s a pretty simple trick but it took quite a few times tearing off the misbehaving foil tape to figure that one out, haha.
And ya I can’t wait for the 1/350 TOS Enterprise to get out into the wild. Did you sign up for the 1701 club too? It really looks amazing, especially because of the included lights and motors. No more headaches from Arduino coding! haha. Thanks again for all your help on that too btw!